How-to Install an
Exterior Door
Exterior
Door Installation
If your exterior door is old and worn out, or
if you're simply getting tired of the way your house looks, it
might be time for a new front door. New doors are often more
energy efficient than older doors, and they also offer better
security.
Materials:
measuring tape
pry bar
hammer
chisel
hammer
screwdrivers
drill, with drill bits and driver bits
utility knife
circular saw
hacksaw or reciprocating saw with metal-cutting blade
miter saw
wooden shims
caulk gun with butyl caulk
pre-hung door
exterior trim
weather stripping
safety glasses
work gloves
Steps:
* Although you can install a door from
scratch, it's easier to install a pre-hung door, which includes a
pre-assembled doorjamb with the door attached.
- Start by measuring the opening for the
doorway; measure for the actual doors as well as for the rough
opening. That way you'll be sure your new door will fit
properly.
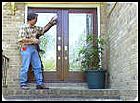
- After you get the new door, remove the
old one by tapping out the hinge pins and pulling the door off
the hinges.
- Use a utility knife to score between the
molding and the interior wall, and remove the molding with a pry
bar. Be careful when you remove the molding; you might be able
to reuse it.
- Unscrew the hinges from the jamb; there
may be some long screws that extend into the wall studs.
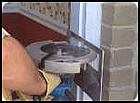
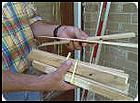
- Use a circular saw to cut through part of
the jamb (figure A), about halfway up, and then pry the
remaining portion away with your hands or a pry bar. Remove the
entire jamb. You may need to use a utility knife to break the
caulk seal between the jamb and exterior wall. Also, a hacksaw
or reciprocating saw may be needed to cut through any fasteners
that won't come out.
* Check the door manufacturer's instructions regarding removal
and installation of the doorbell.
- Check the doorway opening to be sure it's
plumb and level before you start installing the new doorjamb. In
some cases you might want to remove the subsill (figure B ),
which lies beneath the threshold; however, if it's in good shape
you can leave it in place.
- Dry-fit the new door to be sure it fits
properly. You may need help moving the door.
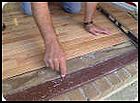
- Pull the door back out of the opening,
and run a generous bead of butyl caulk along subsill (figure
C).
- Attach two pieces of scrap wood in the
upper corners of the doorway on the interior side. The wood will
act as a brace to help hold the door upright.
- Set the bottom of the door in place, and
raise the top into position. Make sure it's plumb and level, and
temporarily nail the frame into place.
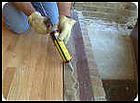
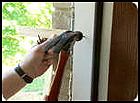
- Insert shims between the frame and the
wall (figure D) to prevent the door from shifting from
side to side. Place shims behind every hinge as well as any
other place that appears to be bowed inward. Then secure the
door by driving tenpenny finish nails through the jamb and shims
(figure E).
- Trim off excess shims with a utility
knife; just score along the shim and break it off.
- For additional security, remove one short
screw from each hinge and replace it with a 2-1/2-inch screw
that extends into the wall stud.
- Open and close the door to test the
operation. You can make sure it's level by opening the door to a
certain point and then leaving it; if it doesn't move, you've
done it right.
- Apply exterior trim such as brick
molding. When the trim is in place, run a bead of caulk between
it and the exterior wall.
- Push fiberglass insulation between the
doorjamb and the wall; don't push it in too tightly because
you'll reduce its effectiveness.
- Attach interior trim around the door. If
you're not reusing your original interior trim, try to find
something that will be large enough to cover any imperfections
you might have caused when you removed the door.
- Install weather-stripping if the door
manufacturer recommends it.
- Install the door handle and deadbolt
lock.
Reprinted from HGTV online

Watch an
excellent video describing general best practices for exterior
door installation. |